
Automatic In-between Frames of Snappy Animation using Linear
Interpolation
Selly Artaty Zega
1
, Seah Hock Soon
2
, Ardiman Firmanda
1
and Liony Lumombo
3
1
Informatics Engineering Department, Politeknik Negeri Batam, Jl. Achmad Yani, Batam, Indonesia
2
School of Computer Science and Engineering, Nanyang Technological University, Singapore, Singapore
3
Engineering, Architecture, and Information Technology, The University of Queensland, Brisbane, Australia
Keywords: In-Between, Snappy, Linear Interpolation, Formulas.
Abstract: This paper aims to study methods for performing transition to produce specific formulas to generate in-
between frames of snappy animation pose automatically from two input key frames. By using linear
interpolation in looking for a value between given training data set of the referral movement of animation,
this study can obtain five formulas. Based on the two given key frames, the formulas can generate in- between
frames automatically. The formulas have been applied to a 3D hand model, and the result shows that it can
produce in-between frames of snappy animation automatically, and it also reduces the time needed to produce
the key frames that are usually made by hand key frame.
1 INTRODUCTION
One of the goals of research in animation is to be
automated as much as possible (Zhigang & Noh,
2007). As research in computer graphics progresses
and technology continues to improve, more of the
animation process will certainly become automated.
Some animations today are still manually and
carefully drawn by animators. However, many
animators have learned how to use software to
manipulate objects in a scene. In some cases, the
technique is used to produce only the scene for key
frames, and software is used to produce the in-
between frames automatically. One of them is Pixar
Animation Studios, where their animators determine
the pose of the characters by using Pixar’s animation
software that will also create the in- between poses
automatically. This software is specifically built for
their own studios. Animators also adjust the
animation to conform to the concept of animation that
has been determined.
This paper aims to investigate and build a simple
interface as a plugin for the 3D animation software,
Maya, to generate in-between frames for snappy
animation using linear interpolation. As an example,
the plugin is built using MEL script and applied to
animate a 3D hand model. Specifically, the objectives
of this study are to build a 3D hand model with
rigging and skinning, create the main pose of a 3D
hand model, and build a plugin that can generate in-
between frames that will eventually produce a snappy
style animation. Therefore, this study proposes the
formula to find the in-between frames using linear
interpolation to be applied to a plugin which becomes
an additional interface between users and 3D objects.
Animation studios use computer animation to
create their animation. One of them is Pixar
Animation Studio, where their animators do not draw
every shot as required in traditional animation.
Character models, property, setting, dialogue and
sound are first prepared, and animators will then
determine the pose of the characters by using Pixar’s
animation software. Furthermore, the computer will
create the in-between frames which require
adjustments as necessary by animators to get the best
pose. This is common for every single shot before the
director or lead animator is satisfied with the
animation (Vardanega, 2013). Computer animation
use algorithm to generate synthetic motion
automatically (O’Brien & Hodgins, 2000).
Interpolation is the main factor to create a final
motion (Hodgins, O’Brien, & Bodenheimer, 1999).
The properties of an object such as position, size,
orientation, color etc. can be calculated using
interpolation. Linear interpolation estimates the in-
between of two given values on a straight-line, and
12
Zega, S., Soon, S., Firmanda, A. and Lumombo, L.
Automatic In-between Frames of Snappy Animation using Linear Interpolation.
DOI: 10.5220/0010351000120019
In Proceedings of the 3rd International Conference on Applied Engineering (ICAE 2020), pages 12-19
ISBN: 978-989-758-520-3
Copyright
c
2021 by SCITEPRESS – Science and Technology Publications, Lda. All rights reserved

this basic interpolation is the simplest type of
interpolation (Pai, 2004).
Likewise, in visual, the animation style also
improves and produces a different and attractive
style. For example, the movement style of Gru in
Despicable Me the movie that used snappy style is
different from the characters in the Final Fantasy VII
Advent of Children, the movie that used the realistic
style of animation. One difference can be seen from
the use of timing and spacing. Timing and spacing is
important in animation to make the animation feel
alive, has a distinctive character, and show emotion
(Blair, 1994). However, today’s applications are not
yet able to generate the in-between frames
corresponding to the specific animation style used.
The animators use their skill to modify in-between
poses manually.
Animated movies have a lot of styles that show
the character of the film. One of them is snappy
animation (Lango, 2003). The use of snappy
animation is a direction towards more cartoony
animation. Snappy keeps movement and timing
interesting, thus keeping the audience engaged in the
motion. Both timing and spacing contribute a lot to
make things snappy.
For this project, given a static 3D hand rigged
character and some 3D animation examples, we want
to predict the in-between frames of two or more
golden keys to produce the snappy style. This
research investigates the pattern of snappy animation
published by an animator named Lango (2003). This
snappy style will be used as training data to find
formulas of in-between frames using linear
interpolation. Data of in-between frames can be
generated using linear interpolation which calculates
the value of attribute input key frame by a user.
2 BACKGROUNDS
Previous research conducted by Fabian Di Fiore
introduced a method for automatic in-between in
computer assisted traditional animation. The study is
based on a 2.5D modeling and animation techniques
within a multi-level approach (Di Fiore, Schaeken,
Elens, & Van Reeth, 2011). This study aims to
eliminate the time- consuming aspect of traditional
animation, especially the repeated drawing of all
characters in all frames. In the traditional 2D
animation, the inking and painting are regarded as
being equivalent to the rendering stage in 3D
animation. It combined the modeling and animation
process into a single drawing process. Di Fiore, et al.
(2011) automatically generates in-between frames
using a 2.5D modeling and animation technique,
which implements as a multi-level software
architecture.
In-betweens are the drawings of the rest of the
frames. In computer assisted animation, an in-
between interpolates between the two key frames
(Pollard, 2019). By using computer, it is hard to get
the right movement; sometimes it does not look
natural. In traditional key framing, lead animators
draw the golden keys/poses, while a junior animator
or sometimes underpaid drones draw the in-betweens
(Pellacini & Marschner, 2014).
By using computer key framing in 3D animation,
lead animators also create important frames or golden
keys with a 3D software, and then the computer
generates the in-between frames. Each key frame is
defined by a group of parameters. The sequence of
key frames captures points in high- dimensional state,
and the computer interpolates these points by using
splines. Each variable has different timeline, it
specifies its value at the important frames, sometimes
not all variables are important. Key values of the
variables create path for each parameter by
interpolating key values.
Figure 1: Key values interpolation (Pollard, 2019).
In a production department, how to get a crafted
animation is based on practices and experiments of
doing the key framing, such as an apprentice to an
animator. There are two sub-problems of automating
in-between in 2D animation (Patterson & Willis,
1994): how silhouette outlines change and how the
various parts of an object occlude themselves. The
key components to effective in-between are: the use
of polar coordinate interpolation, appropriate
continuity control and a 2.5D hierarchy display model
(HDM). Using non-uniform splines with C1
continuity can produce quite good interpolation for
in-between.
The implementation of interpolation also
encounters some problems:
Splines do not always give the right
movement;
Important constraints may break between
key frames, for example: feet sink through
the floor, hands pass through walls;
In 3D rotation, Euler angles do not always
interpolate in a natural way.
Automatic In-between Frames of Snappy Animation using Linear Interpolation
13

However, there are solutions that can be applied:
Use more key frames;
Use quaternions to help fix the rotation
problems.
The solution to using more key frames is part of
the performance of linear interpolation. Using more
key frames can result in better control of linear
interpolation (Pellacini & Marschner, 2014). In
addition, the rate of change within a segment is
constant, resulting in easily interpolation control
(University of Waterloo, 2020).
Sooyeon (2015) purpose other transition method
of linear interpolation by generating the intermediate
posture and calculate the transition length and
performing a weighted blending. The linear
interpolation of this study uses cross- fades and
blending techniques. Sooyeon develop direct and
natural interaction with a 3D character using motion
capture Kinect and Unity for animation transition.
Unity provides key frame animation which enables
the user to control the animation. This study enables
the smooth transition without any bounce (Sooyeon,
2015).
In this study, the snappy animation from Keith
Lango’s tutorials is investigated to be trained and to
be used to generate formulas using linear
interpolation for automatic in- between of snappy
animation. Given a static 3D hand rigged object and
some examples of 3D animation oh hand motion, we
want to predict the in-between frames of two or more
golden keys to produce the snappy style. The
implementation of linear interpolation is to find the
anticipation, moving hold, pre-anticipation, follow
through and settle back position.
3 SNAPPY ANIMATION
TRANSITION
3.1 Linear Interpolation Transition in
Animation
Interpolation in animation is filling in frames between
the key frames, or simply called in-between. In
traditional animation, junior artist draws every single
of in-between frames. Without in-between, animation
will be appeared choppy. Today’s animation,
computer can handle this type of task. This is two-
dimensional straight line. The key point (key frames)
is defined by the artist, and then the computer
algorithms perform a straight-line displacement. By
using linear interpolation, an object moves forward
with some iteration along the X and Y directions,
repeated until the end position is reached.
3.2 Snappy Animation
Based on the 12 principles of animation, there are two
general approaches to create movement in animation,
they are straight ahead action and pose to pose action.
In the straight ahead action, animator starts drawing
in a first scene and then continues drawing all the
subsequent frames until the end of the scene is
reached. This approach creates very spontaneous and
wild action. While in the pose-to-pose action, the
animator carefully plans the animation by drawing a
sequence of poses, i.e., the initial pose, some in-
between and the final poses and then draws all the in-
between frames (or usually another artist or the
computer draws the in- between frames). This
approach is used when the scene requires more poses
and timing is important (Owen, 1999).
Creating key frames using computer is not much
different than hand drawing key frames. The software
also implements the principles of animation. In hand-
drawn animation, an animator works on the basic
poses of the scene first, drawing poses of the entire
character so the timing and acting can be worked out
with a minimum of drawings created. Once the poses
are finalized, then the in-between drawings are
created to complete the action. With computer
animation, every part of an object has a different time
line; key frames are values at certain frames for the
articulation controls of a model, which are usually set
up in a hierarchy. The computer calculates the in-
between values based on a spline curve connecting
the key frames values. Some animators add a key
frame on the in-between frames to get the desired
result. The important thing of drawing key frames is
to have a clear idea of the pose of the action to achieve
before starting to create a key frame.
This is similar to create key frames with computer
graphics, but it requires slight modification since the
in- between generated by the computer sometime can
be unpredictable. For example, objects or parts of
objects may intersect one another. An advantage of
using computer key framing is the hierarchical model
structure of a complex object. Different parts of the
hierarchy can be transformed at different key frames.
1) Combining the Pose-to-pose and Straight
Ahead Action: Based on experiences (Lango, 2003),
this offers an alternative methodology to continue the
initial pose by adding breakdown keys, anticipation,
settle back position, moving holds and some other
things related. The combination of pose to pose action
ICAE 2020 - The International Conference on Applied Engineering
14
and straight ahead becomes an alternative way to
proceed to the next key frames.
2) Moving Hold: As an example, a character hits
a pose on frame 10 and will hit the next pose on frame
24. There are 14 frames in-between these two poses.
By moving the second pose earlier than frame 24, it
can hit the second pose earlier, i.e., count back 5
frames from 24, so the end of the hold pose on frame
10 will occur on frame 19. Finish the pose by slightly
adjusting the pose. When the character stops
immediately and does not move, the movement
looked lifeless. By moving the pose slightly, the
character will get a good moving hold.
As Lango (2003) states in his article, traditional
animation did not necessarily have moving holds
because the animator can draw the natural movement
which is enough to keep the drawing of a character
from an instant stop. He also added that usually 2D
animation with 12 fps already has a built-in
abstraction of motion that allows animator to prepare
imagery drawing to stop and be held for several
frames without looking like it is falling apart.
Moreover, the animator could always do a trace back
to redraw and adjust the image based on the previous
image, thus keeping the image alive during the holds
(Owen, 1999). There are three parts of a moving hold:
amount of movement, variation of energy and the
concepts of contrast.
3) Offsetting Keys: If a character has two poses
with breakdown keys in-between to help define the
arc of the motion and every part hits on the same
frame, this movement is not natural. The parts need
to be shuffled a bit. Shuffled key method overlaps
various key frames to loosen things up a bit.
4) 3D Arm Modeling, Rigging and Skinning: For
our experiment, the arm is created by using a polygon
cube. Extrusion, edge looping, translation, scaling,
and rotation is used to modify the cube to become an
arm. After completing the modeling process, we
continue with the rigging process. This step creates
several joints to be attached to the mesh. Autodesk
Maya provides the interactive skin to bind the mesh
and joints.
5) Snappy Animation on a 3D Arm Modeling:
Snappy animation consists of an intentional faster
movement and makes things longer. A subtle
anticipation movement is added to build tension and
energy. This movement will be felt much faster and
natural.
If the arm moves fast without building up the
energy, the move would look very herky-jerky. By
building this extra ease out into the arm, it can
magnify the ability for the arm to release that energy.
Hence build out through the back end of the move.
The hand has several controllers with filtered
attributes i.e., translation and rotation attributes that
will be used for animating the hand (see Figure 2).
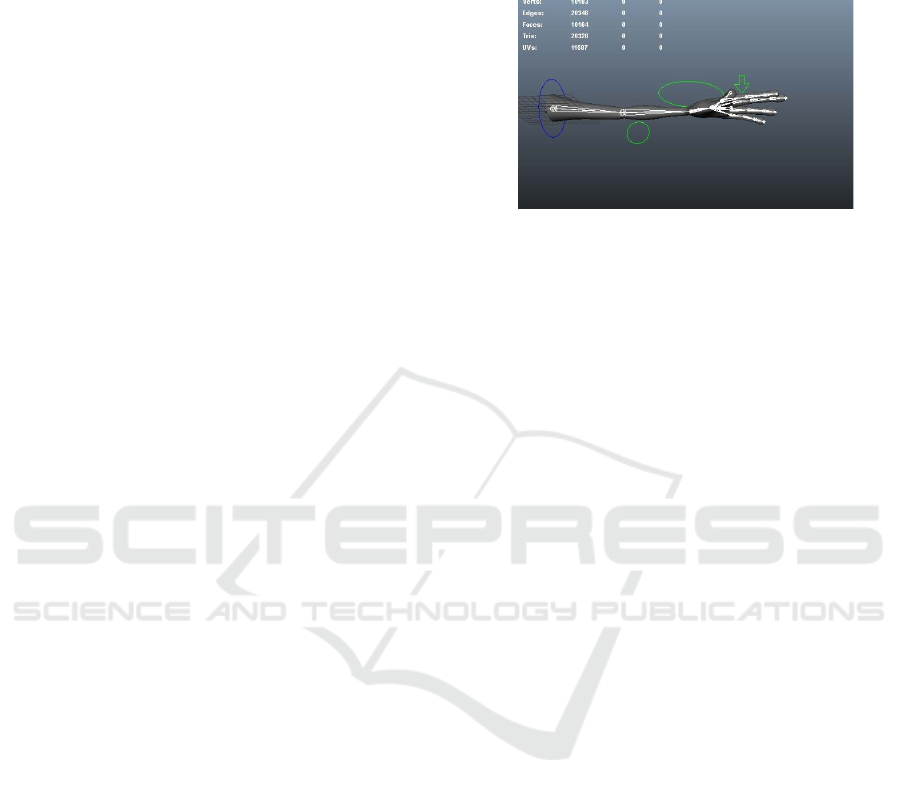
Figure 2: A 3D arm modeling with four controllers.
3.3 Snappy Animation as Training
Data
This study refers to the references presented by Keith
Lango in applying snappy animation to a 3D hand
object. This reference is a learning process to
determine the pattern of applying snappy animation
on key frames. The snappy animation pattern is
applied to 4 control parts of the hand, namely:
globalControl which is located on the upper arm of
the hand, handControl & elbowControl, which are the
arrangement of the forearm and elbow, as well as
fingerControl, which specifically controls the
position of the fingers. Each controller placement is
assigned to each frame in the translation and rotation
of X, Y and Z axis. If visualized in a graph editor
window, then each controller, will have its own graph
for each attribute. In addition, when viewing in the
form of a graph editor, the X axis shows the time
value (frame), while the Y axis is the value of each
attribute on the frame. The results of the training data
from the Keith Lango reference are then used to
produce a formula using linear interpolation.
1)
globalControl: The energy building
anticipation move has 5 frames. The globalControl
then hits its extreme target in just 2 frames. It holds
this target until the lower arm hits. By freezing the
elbow here, essentially waiting for the rest of the
arm to unfold, it will not use any energy from the
move. Without holding the elbow in place while the
rest of the arm unfolds and instead starting to come
back up toward our settle back key, it would be
draining some snap energy from the arm. Locking
the upper arm helps keep the energy focused on the
parts that are still moving in the move. The settle
back for the globalControl has been shortened to
just 3 frames.
Automatic In-between Frames of Snappy Animation using Linear Interpolation
15

2)
handControl & elbowControl: Similar
processes of the globalControl movements are also
applied to the hand & elbow control. However, by
providing the offset, poseB hits the extreme position
one frame later than globalControl. The offset helps
to give a sense of the arm unfolding successively.
The settle back position is also applied for 5 frames
after the extreme position.
These two controllers have some changing values
in two transformations, such as rotation and
translation. However, the movement produces more
curves as it involves more attributes as shown on the
Figure 3.
Figure 3: The curve of extreme and settle back position of
handControl & elbowControl.
3)
fingerControl: The fingerControl moves in
the same manner as the globalControl. If
handControl and elbowControl have been offset one
frame later than globalControl, then fingerControl
moves 2 frames later than globalControl. The settle
back position occurs 5 frames after hitting the
extreme position. Since fingerControl only needs to
be changed along the Z rotation, then significant
changes only occur in the blue Z rotation curve as
shown on Figure 4.
Figure 4: Curves of extreme and settle back position of
fingerControl.
4)
Creating Key Frames for Hand Movement
with Snappy Animation Style: Here are the steps to
create a snappy animation on the hand movement
according to the procedure by the Lango (2003). A
soft anticipation is added to build tension & energy;
with faster movement the hand will look natural.
The anticipation is also applied on the arm to
magnify the energy, holding the anticipation, and
letting it explode out through the back-end move.
a)
Upper Arm
Anticipation for energy building
movement: 5 frames;
Upper arm hits the extreme pose: 2 frames;
Holding the target until the lower arm hits;
Freezing the elbow, to wait for the rest of
the arm to unfold;
Locking the upper arm helps to keep the
energy focus on the other parts that are still
moving;
Settle back movement: 3 frames.
b)
Lower Arm
Anticipation for energy building
movement: 5 frames;
Storing energy (like holding breath): up
for 2 frames (longer than upper arm);
When the upper arm hits its extreme pose,
the lower arm also unleashes the energy to
hit its extreme just in one frame (this is
managing the energy);
Then put the settle back over 5 frames.
c)
Hand/fingers
Keeping the energy as much as possible;
Keep forcing the hand to stay curled back
even while the upper arm is hitting its
extreme pose position;
Then the arm explodes with the pent-up
energy just in one frame (like the lower
arm), exception for the finger;
Offsetting the finger by a frame to give
some overlap and help soften blow
Overall, to include the energy building
anticipation and recoiling settle back from the
extreme, it takes 13 frames.
Figure 5: Curve of hand snappy movement based on the
Keith Lango [7].
ICAE 2020 - The International Conference on Applied Engineering
16
4 IMPLEMENTING AUTOMATIC
SNAPPY ANOMATION
This study implements snappy animation style based
on Keith Lango’s version (Lango, 2003). The energy
building for anticipation, moving hold, and settling
back are shown in the curves of Fig. 5.
Furthermore, the X-axis shows the time of the key
frame and the Y axis shows the value for each
parameter of the key frame. The required inputs are
key frames created by the user (animator) as a pose.
The pose to pose animation uses key frames to plan
the action. Animators draw important poses initially,
then the tool will fill in the in-betweens. This tool will
create automatic anticipation, moving hold, pre-
anticipation, offset and settle back key frames. Based
on the experiments that have been conducted, linear
interpolation is used to calculate the positions and
values of key frames and generate some formulas.
To calculate the value of the time as shown on the
X axis on the curve, the following formulas are used
to calculate each key frame based on the experience
of snappy animation as training data:
Anticipation:
𝑋
𝑋
𝑋
𝑋
∗0.56 (1)
Moving hold anticipation:
𝑋
𝑋
𝑋
𝑋
∗0.75 (2)
Pre-anticipation:
𝑋
𝑋
𝑋
𝑋
∗0.33 (3)
Follow through:
𝑋
𝑋
𝑋
𝑋
∗1.33 (4)
Settle back:
𝑋
𝑋
𝑋
𝑋
∗1.56 (5)
X
1
=the time of first key frame
X
2
=the time of last key frame
Whereas the value of Y axis is the value of
attribute on each key frame, as shown on the
following formulas:
Anticipation:
𝑌
.
(6)
Moving hold Anticipation:
𝑌
.
(7)
Pre-anticipation:
𝑌
𝑌
𝑌
𝑋
∗0.19 (8)
Follow through:
𝑌
(9)
Settle back:
𝑌
(10)
Y
1
=the value of first key frame
Y
2
=the value of last key frame
By holding the pose slightly, the character will not
stop immediately and it will give a natural movement.
In this tool, the value of anticipation and moving hold
anticipation and moving hold anticipation are the
same, hence the pose is maintained for several
frames.
The constant values are experimental values,
which are implemented on the formula as default
values. On the other hand, the tool provides an
animator a means to adjust the constant values.
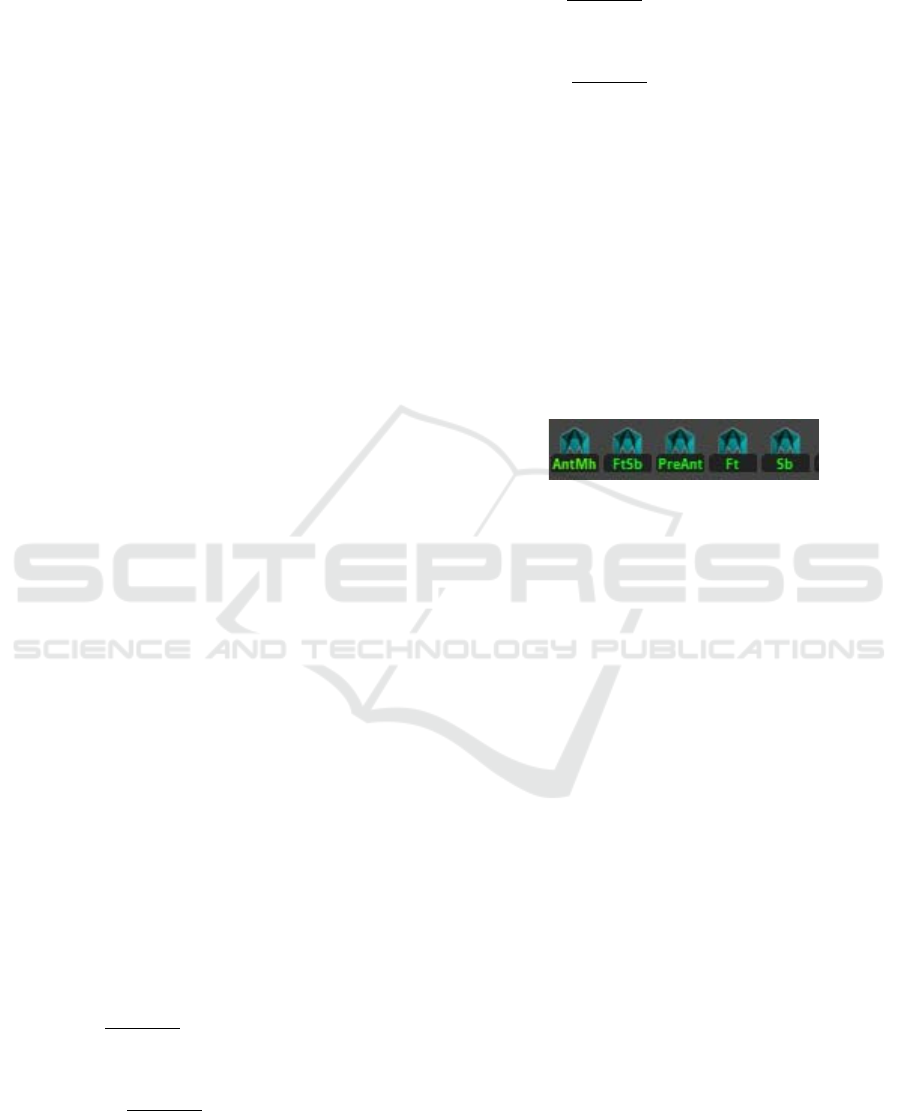
Figure 6: The tool structure.
In the tool structure, anticipation and moving hold
anticipation can be incorporated into one button to
accommodate animator to get an automatic
anticipation and moving hold in a single click. Pre-
anticipation is an optional key; an animator can
choose whether to use it or not. Follow through and
settle back also can be combined into one button.
User can double click on the button to adjust the time
and the constant value instead of using the default
values.
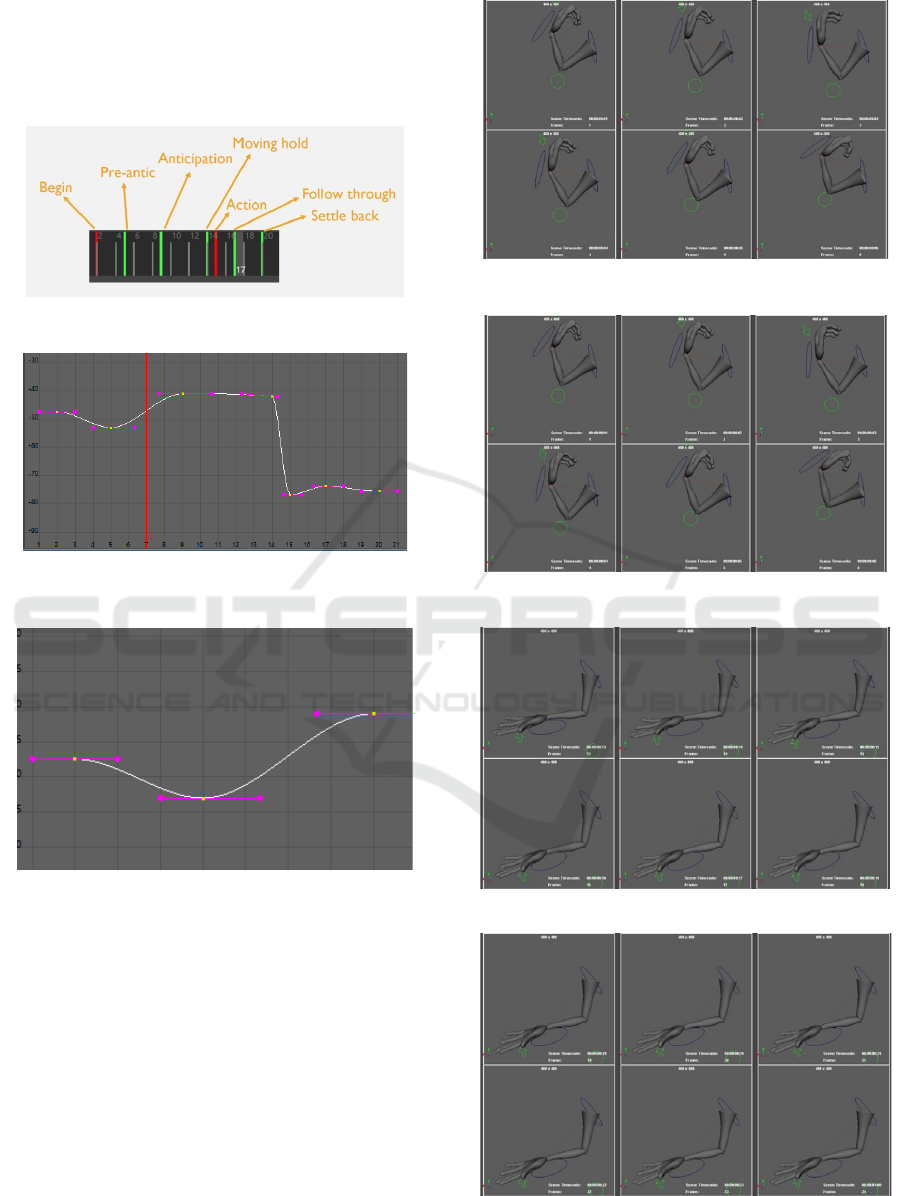
Figure 7 is a snapshot of a timeline after
implementing the five automatic key frames. The red
color key ticks are the input key frames, such as first
key and last key. The automatic key frames are
represented with the green color key tick.
Figure 8 shows the curve of the automatic key
frames on an attribute controller. As one of the
animation principles is slow in slow out, by using the
auto tangent of Maya 3D, the slow in slow out
principle can be implemented. Figure 9 shows the
snapshot of the attribute curve on several frames that
implements the arc movement.
Figure 9 shows the result of an automatic in-
between from two input key frames by implementing
the linear interpolation to find the anticipation,
moving hold, pre- anticipation, follow through and
settle back positions. It adopts the snappy animation
approach by using the experimental (Patterson &
Willis, 1994) value as a constant on the formula. This
Automatic In-between Frames of Snappy Animation using Linear Interpolation
17
tool also allows user to adjust the value of attribute by
changing the constant value. This tool implements
some of the animation principles, such as
anticipation, slow in slow out, pose to pose, arc, and
follow through & overlapping action.
Figure 7: Timeline with automatic key frames.
Figure 8: The curve of one attribute controller with slow in
slow out movement.
Figure 9: Arc curve of an attribute key frame.
The animation result of implementing this tool to
the 3D arm model is shown in the following image
sequences of Figure 10, 11, 12 and 13.
Figure 10: Image sequences of frame 1-6.
Figure 11: Image sequences of frame 1-6
Figure 12: Image sequences of frame 13-18.
Figure 13: Image sequences of frame 19-24.
ICAE 2020 - The International Conference on Applied Engineering
18

5 CONCLUSIONS
This research has applied snappy animation based on
Keith Lango's article, and produced a tool for creating
snappy movements in the form of linear interpolation
formulas that is contained in a 3D Maya plugin.
Besides generating automatic key frames, further
studies are to be done to determine the calculations
and formulas based on the experience of animators.
Creating automatic key frames by linear interpolation
might be compared with other interpolations.
ACKNOWLEDGEMENTS
We would like to sincerely thank Santiago Esteban
Montesdeoca, whose advice and suggestions on
animation technique and programming helped us a lot
while we were working on this project. We also
would like to send thanks as well to the authors whose
articles and books kept me company in this studies.
Their names are in the references.
REFERENCES
Blair, P., 1994. Cartoon Animation, Walter Foster
Publishing. Mission Viejo.
Di-Fiore, F., Schaeken, P., Elens, K., Van-Reeth, F., 2011.
Automatic in-betweening in computer assisted
animation by exploiting 2.5D modeling techniques. In
Proceedings Computer Animation 2001, Fourteenth
Conference on Computer Animation, (Cat.
No.01TH8596). https://10.1109/CA.2001.982393.
Hodgins, J K., O’Brien, J.F., Bodenheimer Jr., R.E., 1999.
Computer animation [Course notes]. Wiley Online
Library. Retrieved from
https://onlinelibrary.wiley.com/doi/abs/10.1002/04713
4608X.W7507.
Lango, K., 2003. Tricks for cartoon snappy motion an
energy crisis retrieved from tricks for cartoon snappy
motion an energy crisis. Retrieved from:
http://www.keithlango.com/tutorials/old/toonSnap/too
nSnap.htm.
Lim, S., 2015. Linear interpolation transition of character
animation for Intermediate 3D Response to User
Motion, International Journal of Contents, 22(2), 15-
20.
O'Brien, J.F., Hodgins, J. K., 2000. Computer graphics
University of California - Berkeley. [Course notes].
Retrieved from
http://graphics.berkeley.edu/papers/Obrien-AFX-
2000-12/Obrien- AFX-2000-12.
Owen, G. S., 1999. Incorporating principles and examples
from art/design and film/video into a CS computer
graphics course, Siggraph, 64-67.
Pai, S. G., 2004. Principles of computer graphics, Springer.
Sunnyvale.
Patterson, J.W., Willis, P.J., 1994. Computer assisted
animation: 2D or not 2D? The Computer Journal, 37
(10).
Pellacini, F. & Marschner, S., 2014. Animation. Cornell
CS4620 Dall 2014 Lecture 21.
Pollard, N., 2019. Intro to animation [PowerPoint slide].
CMU15-462/15-662 Computer Graphics. Retrieved
from
http://15462.courses.cs.cmu.edu/spring2019/lecture/an
im.
University of Waterloo, Computer Graphics Lab., n.d.
Introduction to interactive computer graphics.
Retrieved April 30, 2020 from
http://medialab.di.unipi.it/web/IUM/Waterloo/node15
7.html.
Vardanega, J., 2013. Science behind pixar. Retrieved
March 13, 2020 from
https://sciencebehindpixar.org/pipeline/animation.
Zhigang D., Noh, J., 2007. Computer Facial Animation: A
Survey. Retrieved from
http://graphics.cs.uh.edu/website/Publications/2007_fa
cial_animation survey_bookchapter.pdf.
Automatic In-between Frames of Snappy Animation using Linear Interpolation
19
